Take Your Landscaping To The Next Level With These DIY Paver Projects
Pavers are a game-changer for anyone looking to elevate their outdoor spaces with minimal effort and maximum impact. These versatile, durable, and visually appealing materials can instantly transform your landscaping into a functional, stylish extension of your home. From enhancing pathways to creating stunning patios, pavers provide endless possibilities for customization, given that they come in so many different types of materials and styles.
Beyond aesthetics, pavers are practical. Often built from concrete, brick, and natural stone, they are engineered to withstand weather extremes (great for those who get a lot of snow), resist cracking, and handle heavy traffic. These materials are built to endure high compression forces, and their interlocking design ensures even weight distribution and prevents shifting, even after prolonged use. This makes them ideal for everything from driveways to garden paths.
Eco-friendly options, such as permeable pavers, promote sustainability by reducing water runoff and aiding groundwater recharge. These pavers are designed with gaps or porous materials that allow rainwater to seep through into the ground below, rather than pooling or flowing into storm drains. This helps prevent erosion, reduces strain on municipal drainage systems, and naturally replenishes groundwater supplies. Maintenance is a breeze, too — damaged pavers can be replaced individually, saving time and money over the years.
For the DIY enthusiasts, paver projects are very rewarding. With some planning, creativity, and time, you can design stunning landscapes that reflect your style, while boosting your property value. Whether you're dreaming of a cozy fire pit area, a charming walkway, or a vibrant poolside deck, pavers are the key to taking your landscaping to the next level.
Craft a charming pathway to your garden
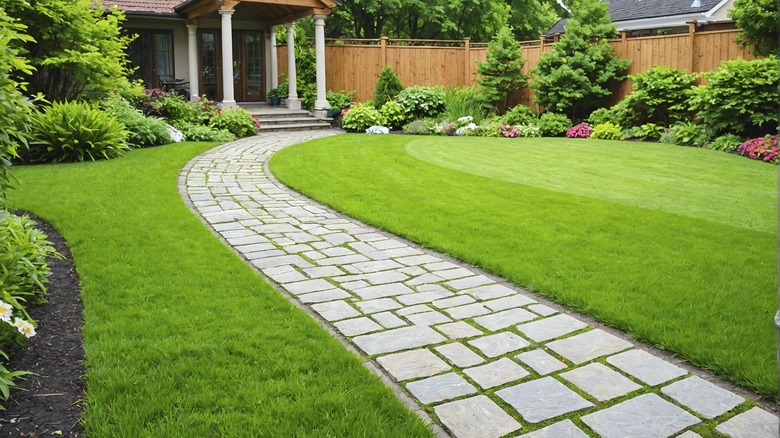
A well-designed walkway adds charm and functionality to any outdoor space, guiding visitors to your garden or yard with style. When done right, it's also an outdoor update that can add serious value to your home. Start by outlining where your walkway will go, using stakes and string. If you want a natural look, consider a curving, meandering path. If you prefer a modern, structured feel, opt for straight lines. Then, measure the length and width of the walkway. This will help calculate how many pavers you'll need to buy.
Next, dig a trench for the walkway, ideally about 6 to 8 inches deep. If you'd like to add landscape lighting, this is the time to run your cables underground so you can access them later. Next, compact the soil using a tamper to ensure that the foundation will be stable. Then, add a 4 to 6 inch layer of crushed stone or gravel to help with drainage. Spread it evenly and compact it thoroughly. Last, add a 1to 2 inch layer of paver sand, leveling it with a screed board to ensure a smooth, even surface. This sand layer will help the pavers sit snugly and prevent shifting.
Finally, it's time to layer the pavers in a pattern you like. Press each paver gently into the sand and use a rubber mallet to ensure they are level. To prevent the pavers from shifting, you can install a paver edging along both sides of the walkway. Once all the pavers are in place, use a broom to sweep paver sand or polymeric sand into the gaps, filling them completely. For added stability, lightly mist the walkway with water to activate the polymeric sand, which hardens and locks the pavers in place.
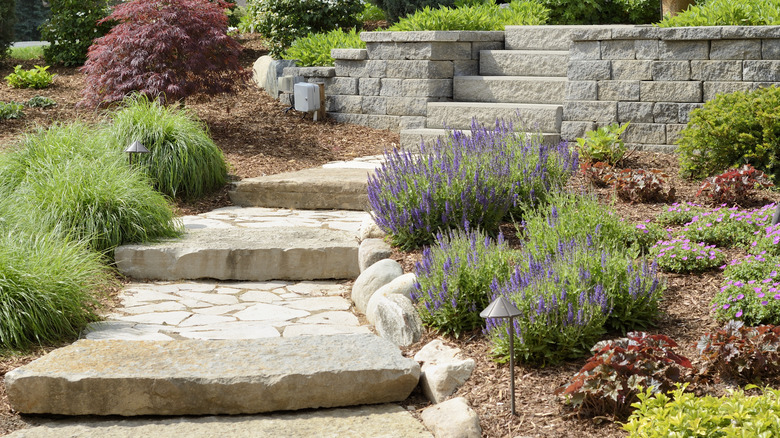
Lay out stepping stones for an aesthetic garden path
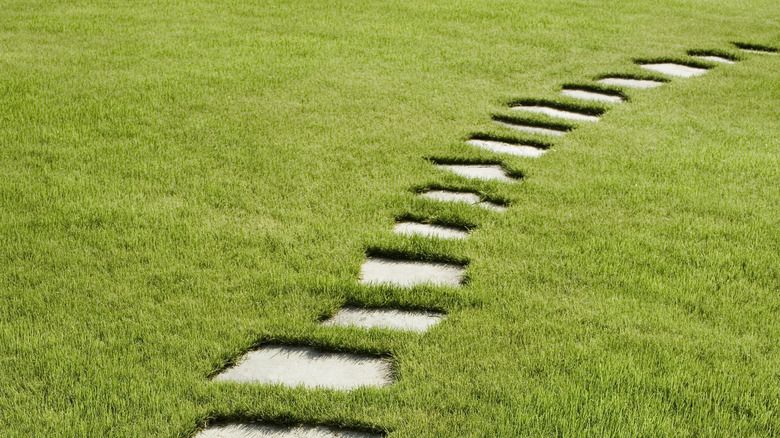
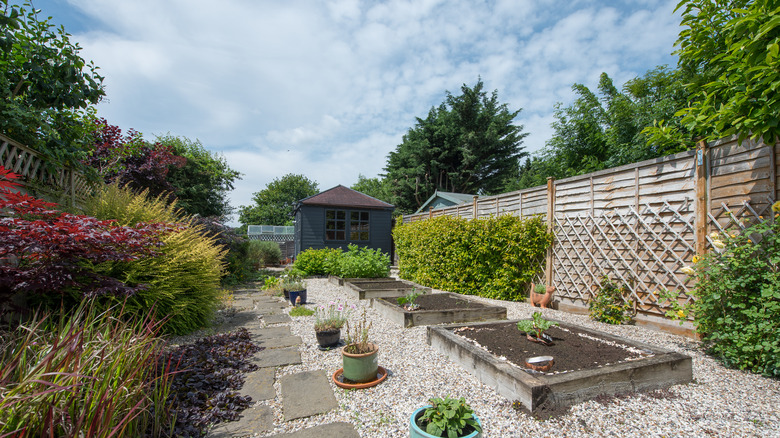
For a more informal and flexible design, a "stepping stone" pathway made with pavers offers an alternative approach to navigating your garden or backyard. Unlike the uniform look of a paver walkway, a stepping stone path allows for more creativity. The stones can be placed with varying gaps between them, giving the pathway an organic, meandering feel that blends seamlessly into the surrounding landscape. It also lets you maintain the natural beauty of your garden, letting grass, moss, or groundcover grow between the stones, further integrating the path into the environment. To enhance the look, you also have the option of filling in the gaps between the pavers with decorative gravel. If you've opted for a no-mow garden without grass, a paver walkway can still do wonders to enhance the aesthetic value of your backyard.
The installation process for a stepping stone pathway is also more straightforward, requiring only shallow depressions for each stone and a light filling of gravel or sand for stability. There's no need for extensive digging or base layers. Unlike in a walkway, where the pavers need a solid, level base to interlock, the pavers will bear the weight, and the small amount of gravel or sand underneath them keeps them stable and level. Additionally, these stepping stone pathways are often used in areas where traffic is light, so they don't require as much structural reinforcement as a paver walkway, making the installation process, simpler, quicker, and less labor-intensive.
Extend your outdoor living space with a paver patio
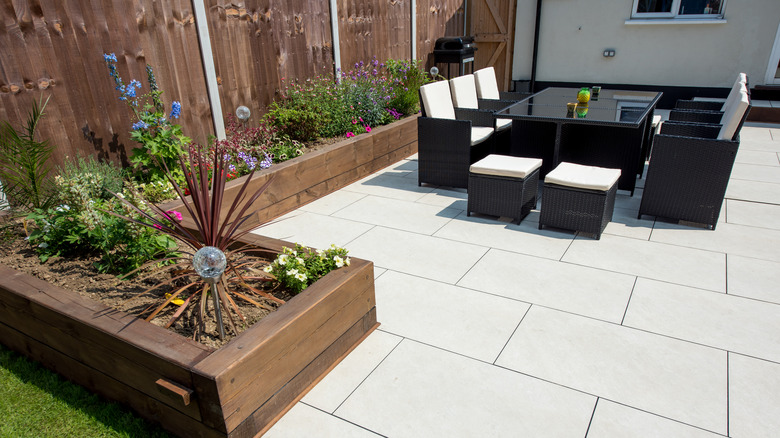
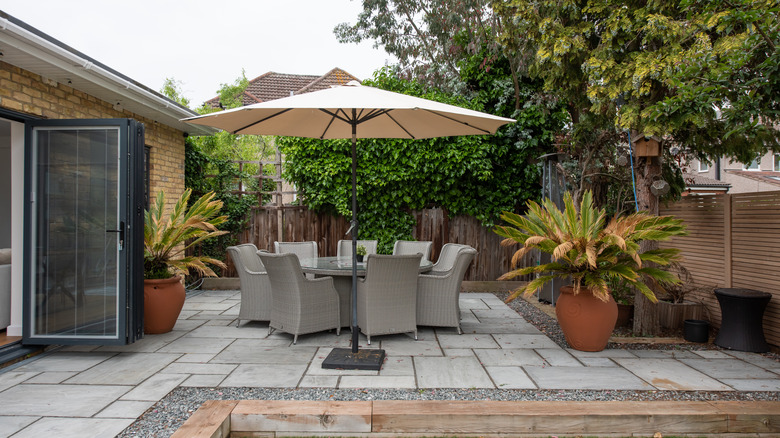
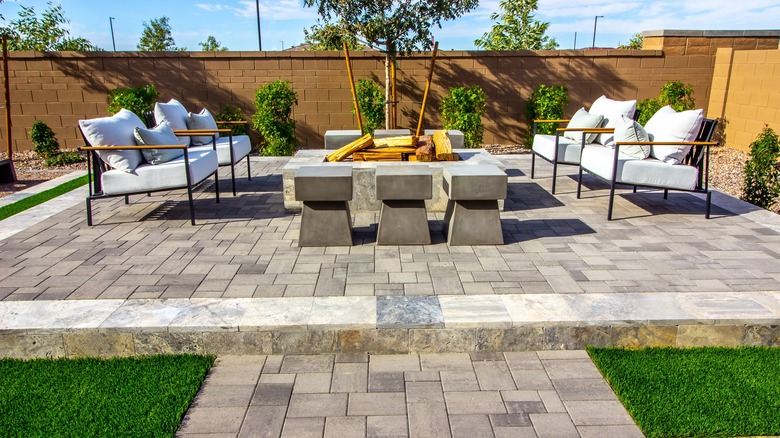
A paver patio is the perfect way to expand your living space and turn your backyard into a functional and stylish retreat. Whether you want a relaxing area for family gatherings, a space for dining under the stars, or a private oasis for reading, a paver patio can completely transform your outdoor area. Start by determining the size and layout of your patio using stakes and string to mark the perimeter. Larger patios offer more flexibility, but even a small patio can make a big impact.
Once again, you have the option of choosing pavers that range from rustic, natural looks to modern, sleek designs. If you're planning on using your patio for dining or lounging, consider when you'll likely be out there and what the temperature will be. Light-colored pavers tend to reflect heat, but darker ones will absorb heat, which could be an advantage on cooler evenings. When you have your pavers, prepare the site by removing grass, roots, and debris. Excavate the area to account for the base layers. Compact the soil to create a solid foundation, and then spread layers of crushed stones or gravel, plus paver sand, to create a smooth base.
Next, it's time to layer the pavers in your chosen pattern. When laying them down, make sure to slope the base of the patio slightly away from your home to encourage water runoff away from your house's foundation. Seal your pavers to ensure it is in place and then consider the additional step of using a patio sealant to keep the patio vibrant for a long time.
Cozy up to a paver fire pit
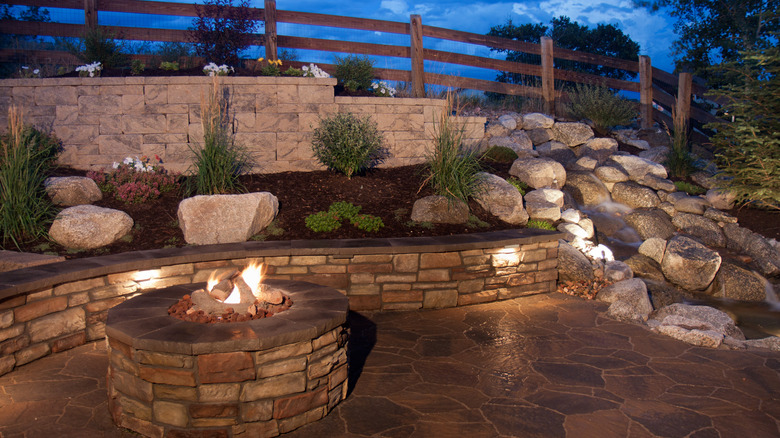
Imagine sitting around the warmth of a crackling fire, all in the cozy ambiance of your own backyard. Whether you're roasting marshmallows, sharing stories, or simply enjoying the warmth on a chilly night, a paver fire pit is a genius way to build a budget-friendly fire pit that elevates your outdoor experience in ways that few other features can. Before diving into your DIY paver fire pit project, check if your neighborhood requires any permits for a fire structure on your property. Once you've cleared that hurdle, select the ideal location for your fire pit. Look for a spot that's away from any overhanging trees, structures, or anything flammable. It's also essential to take into account local regulations regarding fire pit placement and height.
Once you've chosen a spot, dig a shallow hole for the fire pit's base. Adding depth is important, as it allows for proper drainage by providing space for water to flow away from the base of the fire pit, preventing any buildup of moisture that could cause erosion or affect the stability of the structure. Without proper drainage, water could collect inside the fire pit, weakening the pavers over time or creating a soggy, unstable base.
After preparing the base, lay the pavers for the base and walls of the fire pit. Use fire-resistant pavers that are designed to withstand high temperatures. Stack the pavers in a circular or octagonal shape. Make sure to leave some space in between by either using spacers or by creating a slight offset between each paver, ensuring there is adequate ventilation. Lastly, consider reinforcing your fire pit with a fire-proof liner for longevity.
Frame your flower beds with pavers
A garden border from pavers helps define the edges of your flower beds, creating a clean and structured look, while protecting your plants from lawn mower damage. Whether you want to contain mulch, separate the flowerbeds from your lawn, or simply add a decorative touch, pavers are a versatile choice.
Similar to the walkway, you'll want to start by planning the layout of your border, accounting for its pathway, shape, and width. Once your design is set, dig a shallow trench along the perimeter of your flower bed. The trench only needs to be about 3 to 4 inches deep this time, since these pavers won't be used for walking regularly. This also won't disrupt the soil near your flowers too much. After the trench is dug, fill it with gravel and sand, and then you can lay down the pavers. Laying down the pavers can do a number on your knees and back, so invest in a kneeler — which is a tool that even beginner gardeners absolutely need. Once all the pavers are in place, you can add finishing touches, such as filing gaps with pebbles to create a natural look that complements your plants.
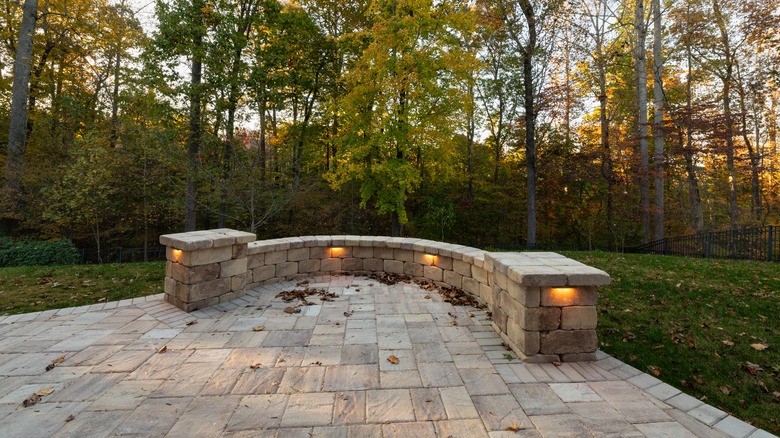
Build a functional and inviting seating wall
A paver seating wall is a stylish feature to a backyard that provides both extra seating and a decorative feature. This type of wall is typically designed to be low in height, providing a comfortable place to sit outdoors. To build this wall, begin by determining where you want it located. Ideally, it should be close to your main entertaining area, such as near the fire pit or patio, so that guests can easily gather and interact. You'll also want to consider the overall layout of your backyard to ensure the wall complements other features.
Once you've selected your location, measure the area and decide on the wall's height. A good starting point is between 18 to 21 inches. Decide on a length based on how many people you'd like to comfortably seat. To lay the base, excavate the soil and layer gravel and sand. Then, begin placing pavers, starting at one end of your design. For a stable structure, it's important to stagger the joints between the pavers as you lay each row, much like laying bricks in a traditional wall. As you go, you may want to apply a layer of construction adhesive for extra stability.
Continue building the wall, ensuring that each layer is aligned and level before proceeding to the next. When you're done, you may want to top the wall with a flat capstone or a row of larger, smooth pavers that provide a more comfortable place to sit. Add finishing touches like plants around the base, or even weather-resistant seat cushions and pillows to create a lush, comfortable look.
Create a poolside oasis with a paver deck
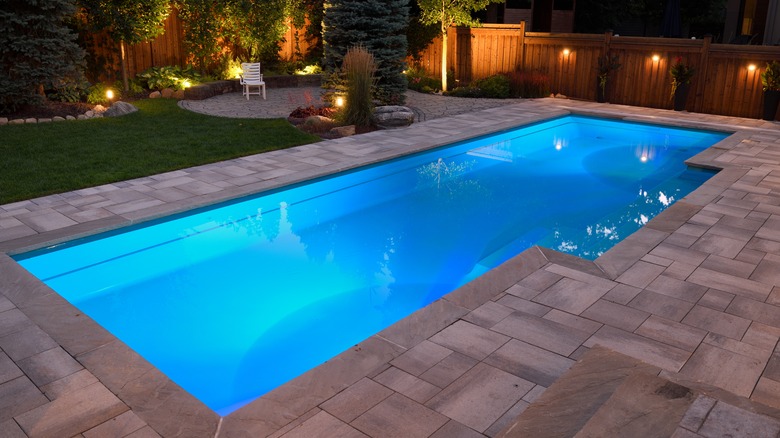
For homeowners with a pool, a poolside paver deck is an great way to enhance your backyard oasis! Unlike traditional concrete or wood decking, pavers offer a variety of colors and textures, allowing you to customize the look of your pool area while ensuring durability and safety. Pavers are also resistant to cracking and can withstand moisture, offering excellent drainage and reducing the risk of water pooling.
Begin by assessing your pool area and determining how much space you want to cover with pavers. Do you want to just line the pool's perimeter or create a more expansive deck that extends outward, providing room for seating, lounging, and walking? The design can be a simple, uniform pattern, or you can get creative with intricate arrangements like herringbone, basket weave, or circular patterns.
When excavating the ground, leave at least 6 inches to accommodate the base materials. You'll also need to consider the slope of the land in order to direct water away from the pool. Lay gravel and sand for durability, and then begin laying the pavers, keeping a gradual slope away from the pool. Make sure you lock the pavers into place with joint sand or fine gravel, and then use a plate compacter to press the sand into the joints. For added protection, use a sealant on the pavers to reduce staining from pool chemicals and prevent moss or algae buildup. Sealing also provides an extra layer of protection against the wear and tear caused by constant exposure to water and sunlight.
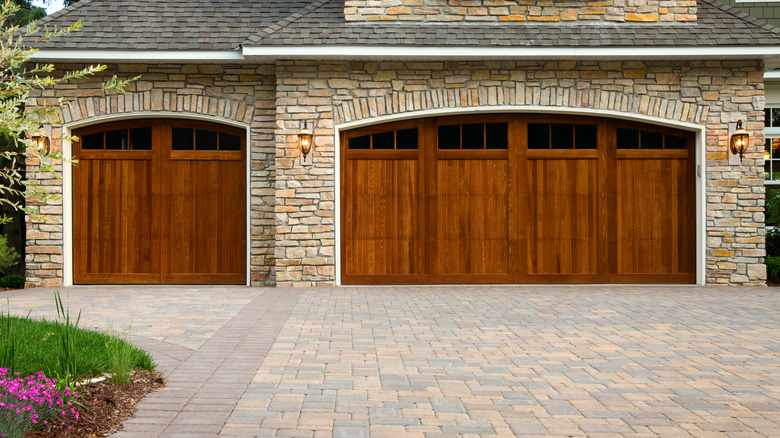
Opt for an aesthetic paver driveway
A paver driveway can be an excellent way to enhance the curb appeal of your home. Not only do pavers provide a sophisticated, custom look, but they're also durable, long-lasting, and relatively easy to maintain. Pavers can be replaced individually, making them a more practical and cost-effective choice in the long term.
Paver driveways do take time to install, so this is likely a project for those with a lot of time to spare. Once completed, in addition to their functionality, paver driveways are highly aesthetic. The wide variety of paver styles, colors, and textures allows you to create a look that complements your home's architecture and landscaping. Manufactures have caught onto this desire and now create pavers that are specifically engineered to withstand vehicle and foot traffic. They are thicker and more robust than those used in walkways or patios, ensuring they can handle the heavy loads of cars and trucks without cracking or shifting. Additionally, some pavers are designed with a textured surface that improves traction, which also enhances safety by reducing the risk of slipping when wet.
Similar to other DIY paver projects, the process begins with mapping out the area you're working with so you can select the right dimensions for your pavers. Then, depending on your house's land plot and terrain, you'll need to excavate accordingly to ensure you have a stable foundation for your driveway. Remember, to account for the slope of the ground as well when laying down the pavers. Last, you can add a border of contrasting pavers along the edges of your driveway for a more refined, polished look.
Elevate your outdoor space with paver stairs
Paver stairs are an elegant and practical solution for navigating elevation changes in your front yard or your backyard, such as if you have a raised garden or patio. To start, consider the rise (height) and run (depth) of each step to ensure a comfortable ascent. Typically, steps have a rise of 6 to 8 inches, and a run of 12 inches. Once you've adjusted based on your specific preferences, mark the area and begin excavating.
Unlike flat paver projects, stairs need extra attention to ensure they remain stable over time. A solid base of compacted gravel or crushed stone is crucial for stability, particularly at the highest point of the staircase where there will be the largest weight to bear. Moreover, since paver stairs will be elevated, using edge restraints is important to prevent the pavers from moving or shifting. These can be installed along the sides of the steps. Finally, consider using textured pavers or sandblasted stone for a non-slip finish, especially if you live in an area that is prone to rain and snow.
Create some privacy with an accent wall
A paver accent wall or privacy screen is another element that you can add to enhance the functionality and aesthetic of your outdoor space. If you want to define certain areas of your garden, create a sense of privacy, or simply add a decorative feature, a paver wall offers a stylish solution. Unlike traditional wood or metal screens, pavers offer a unique textured look that can be customized to fit your personal style and complement your existing landscaping.
Building a paver accent wall follows a similar process to constructing a seating wall, but with a few key differences to dimensions. For a privacy screen, you might opt for a taller design, which a straightforward accent wall might be shorter. Finishing touches like incorporating climbing vines can further enhance the visual appeal of your wall, creating a beautiful focal point in your yard.
