DIY Your Own Water Filter While Camping Or Hiking With These Tips
Whether you are at home or in the woods, water is essential to survival. However, one of the biggest mistakes made when packing for camping or hiking is not bringing enough water or a water filtration device. It is suggested to have at least two gallons of water per day (per person) when camping and one liter for every two hours when hiking. But, it is not uncommon for hikers and campers to run short of drinkable water for a variety of reasons.
Lacking an adequate supply of fresh water isn't just an inconvenience or cause for discomfort, it can present many health risks. Severe dehydration can cause numerous problems and is an issue regardless of season — spring, summer, fall, or winter. Just having a lake, stream, or river nearby won't necessarily resolve your water crisis. Drinking unfiltered water can lead to contracting bacterial infections, viruses, or parasites. According to the National Park Service, it is impossible to tell the contaminants in water by sight, as even crystal clear, clean-looking water may be full of algae, bacteria, chemicals, or parasites.
Additionally, while you need an ample supply of drinking water for any outdoor excursion, you will need even more water for cooking tasty campfire meals. However, if you do find yourself running short of water and are without a purification device, you can DIY your own water filter while camping or hiking with these tips. Keep in mind, while this DIY water filter is a good solution when in an emergency situation, the best practice is still to be prepared. A portable water filter like the LifeStraw Personal Filter should always be included in your emergency hiking supplies.
How to DIY your own water filter
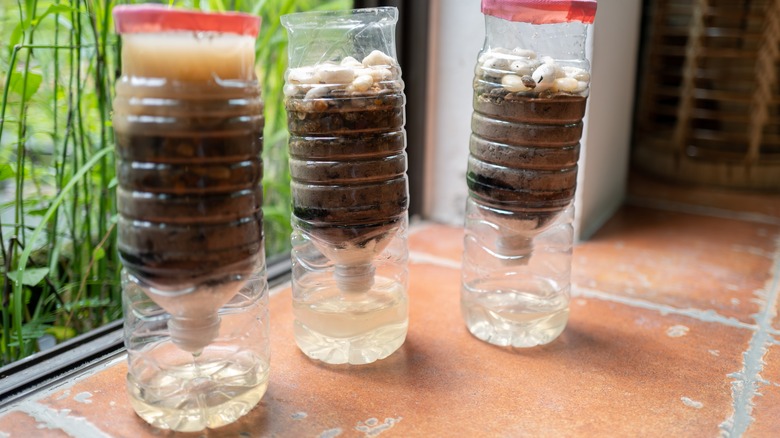
To DIY your own water filter, there are a few things you will need. Most important is a plastic bottle or similar container, as well as a separate container for the filtered water. You will also need filtration materials. Examples of these are cotton balls, cloth, cheese cloth, coffee filters, sand, charcoal, and gravel.
Next, you need to construct your filter system. Start by cutting the bottom off the water bottle. Then, poke several small drain holes in the lid. The next step is to place a layer of fabric to act as a strainer. This layer can be a coffee filter, cotton balls, cheesecloth, or a piece of cloth from clothing. If you have none of these materials, you can use a layer of grass topped with sand. After that, break up a few pieces of charcoal, either from burnt campfire wood or a barbecue grill (although do not use instant light charcoal, which contains chemicals). Place this layer on top of the straining layer, followed by successive layers of fine and coarse sand, if available. Finally, top with gravel or small rocks and cover with a cloth.
Once the contraption is made, slowly pour water into it while holding it over the collection container. The final step is to sterilize the filtered water either by boiling or setting in full sunlight for around six hours. You should continue to repeat this process until you have accumulated an adequate supply of water for you and everyone in your party.

